REQUIRE A BESPOKE LOOK?
We offer a custom design
service at NO extra cost.
It can be tricky to find wardrobes for loft or attic rooms due to the sloping nature of the loft roof. However with some ingenuity and some sliding wardrobe doors the ideal loft storage solution is at hand that will make great use of that otherwise dead space beneath the eaves of the loft roof.
Here we will explain how to make usable loft wardrobe storage using made-to-measure sliding wardrobe doors that run along the sloping eaves side(s) of the loft room. Sliding Doors also give you greater flexibility when planning the layout of the rest of your loft or attic furniture as you do not need to allow for door opening space.
There are a few technical issues to consider when installing wardrobe doors within loft spaces which are outlined below.

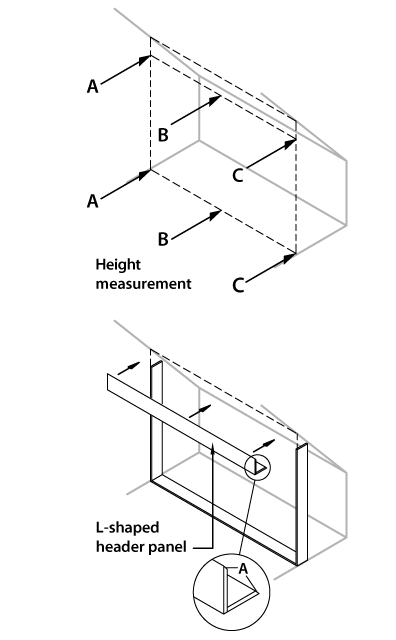
Firstly, decide on the height of the doors you wish to install but remember that they will require the top rail to be fixed horizontally, and the sloping nature of the attic roof will create an area above the top rail which will require infilling to create a neat finished appearance. Measure in at least three places - the centre and both ends eg. at A, B and C and then deduct the height of the infill panel.
IMPORTANT - Use the smallest measurement and deduct the height of the infill panel.
If the loft has been converted into a habitable space and is already fully plastered then the easiest way to install sliding wardrobe doors is to create the conventional framework (bottom liner and left and right strike plates) with an L-shaped header panel that hides the wedge-shaped void between the top of the framework and the underside of the sloping roof (see Diagram 1).
Depending on the height you want this header to be you can either use 100mm width strike plate, 500mm internal shelf or 610mm end panels cut down to size, most installations would use the 100mm striek plate. To get the header panel to sit flush against the ceiling you will need to chamfer the top edge (A) to create the appropriate matching angle. Alternatively, use quadrant beading to hide the gap between the header panel and the ceiling. This L-shaped header panel can be constructed using either corner blocks or timber battening and then screwed to the sloping eaves.

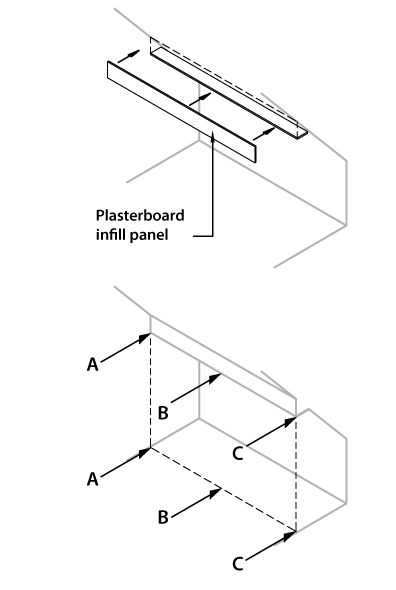
If you are in the process of converting your loft then the framework for the sliding wardrobe doors can be integrated at the construction stage and a plasterboard L-shaped header panel can be fixed above the framework to disguise the wedge-shaped void between the top of the framework and the underside of the sloping roof (see Diagram 2a). This can then be plaster skimmed to match in with the other surfaces.
Measure in at least three places - the centre and both ends eg. at A, B and C and use the smallest measurement.
IMPORTANT - Use the smallest measurement.
Once the L-shaped header panel has been created the installation proces is the sames as a conventional installation.
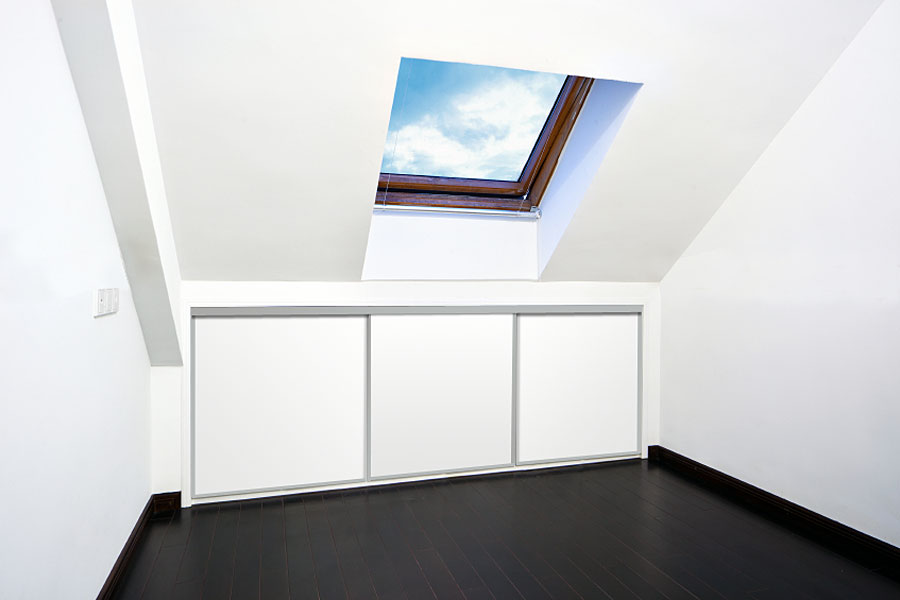
This sliding wardrobe door storage solution was built into the loft conversion at the time of conversion. A L-shaped header panel was created and this was then plastered.The strike plates and liners where then installed and the top and bottom tracks were fixed to the liners. The owner decided to add architrave around the opening which was then painted. Because cost was a priority a silver steel frame and matte white wood were used.

We have many finishes available to match your taste and fit with your loft or attic room design. You can choose these as part of your design here link or give us a call on 0800 035 1730 to discuss your loft wardrobe needs with our friendly design team.

We offer a custom design
service at NO extra cost.
Follow these simple guidelines to
get the perfect fit for your sliding
wardrobe doors.
The sliding wardrobe doors are
very easy to install so you don’t
have to be a DIY expert.
Request FREE samples to help
with the design process and
colour matching.