REQUIRE A BESPOKE LOOK?
We offer a custom design
service at NO extra cost.
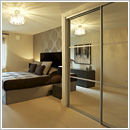
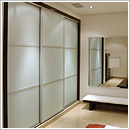
Sloping floors can be a headache when fitting furniture such as sliding wardrobes. But sloping floors need not be a problem. Before you rip up your bedroom floor boards read our guide to the easy way to install sliding wardrobe doors on sloping floors.
It is easy to assume that the floors in our homes are all perfectly level but if you have ever fitted your own kitchen or constructed cupboards or other built-in storage units you will likely have found this not to be the case!
In older properties the floors are prone to sagging or settlement over time and even in newer homes floors may have slight slopes or irregularities that can cause the DIY-er certain problems.
In this article we offer practical solutions on how to overcome your sloping floor problems so you can choose from our full range of sliding wardrobe designs and install them perfectly with confidence.
First of all you will need to determine whether the floor where you want to install the wardrobe doors is level across the line of the doors.
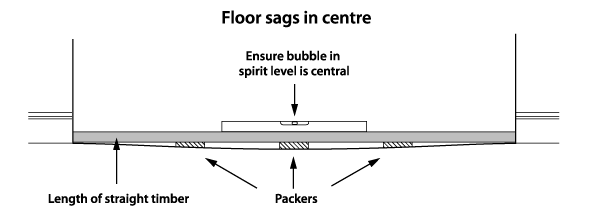
For this you will need a long spirit level or, if you don't have one, a standard spirit level and a long piece of straight, planed timber. Lay the long spirit level (or the length of timber with the standard spirit level on top) along the line of where you want to install the wardrobe doors.
Check whether the bubble in the spirit level is in the centre position of the two guide lines. If it is to one side or the other of the centre point you will need to place packers under the relevant end of the spirit level (or timber) to bring the bubble to the central position.
It may be that some thin slivers of wood or thick card will be adequate for this; however, in extreme cases, thicker pieces of wood may be required to pack the spirit level to achieve a level surface - see the diagrams below:

If your floor has a slope of more than 8mm across the full width of the wardrobe doors we recommend that you include bottom and top liners in your order. This will make the task so much easier for you.
Using the same method as above you may find that your floor is the same level at each side but shows a dip or sag towards the centre. In this instance insert packers at equal spacings across the width of the gap, between the length of timber and the floor - see diagram below.
These packers can then be used to support the bottom liner at various points across the width of the installation to achieve a perfectly level surface. See the section below for how to fix the packers and bottom liner in place.
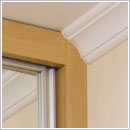
While you are checking the floor level it is also a good idea to check whether the walls are plumb and straight. We have written about this in our article How to fit sliding wardrobe doors when your walls are not plumb and straight.
If your floor shows a slope of more than 5mm across the width of where the sliding doors are to be installed, or it sags in the centre, there are two simple alternatives to create a level surface on which to fix the bottom track for the doors:
- Bottom liner and packers
- Raised plinth
This process is covered in detail in the 12-page installation guide you will receive with your doors. However, the illustrations below show the basic method for levelling and fixing the bottom liner on either a sloping or sagging floor. Once the bottom liner is perfectly level and has been secured to the floor with suitable countersunk screws the bottom track can be fixed on top of it.
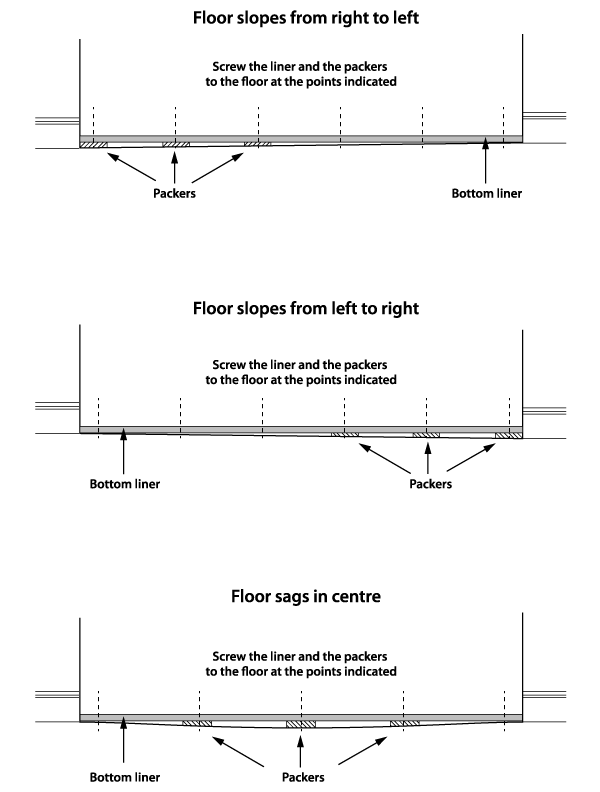
If the slope or sag of the floor is substantial you may need to use quadrant beading or a similar moulding fixed against the front edge of the liner to hide any gaps between the floor covering and the base of the bottom liner - see the section below for how to do this.
As an alternative to using packers with the bottom liner to create a level surface you may wish to create a raised plinth and floor for the inside of your wardrobe. Building a plinth provides a good way of disguising severe slopes or sags in your floor as the discrepancy in levels can be ‘lost’ more readily in the height of the plinth. The plinth can be created at any height you wish but a good idea is to build it so that the top surface is level with your existing skirting boards. Depending upon whether the existing skirting boards are level you may be able to use a length of matching skirting board to face the front edge of the plinth. The plinth facing can be cut along the base to correspond with the slope or sag of the floor. The top of the plinth (which will form the raised floor to your wardrobe) can be constructed from MDF, chipboard or plywood and should be supported on timber battens to create a perfectly level surface on which to fix the bottom track - see the diagrams below.

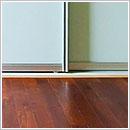
If you are installing your sliding wardrobe doors directly over an existing carpet then depending on how much the floor slopes or sags you may be able to use packers locally under where the liner is screwed to the floor.
If the gap is reasonably small (eg less than 5mm) then the carpet should mask the difference. If the gap is larger than this please see the section below.
How do I hide the gap between the liner that is level and the sloping/sagging floor?
Once you have packed and levelled the bottom liner and it is secured to the underlying floor you may be left with a gap at the left, right or centre, between the liner and the floor. This can be undesirable if your chosen floor covering (carpet, laminate flooring, vinyl flooring etc.) will not be of sufficient depth to disguise the gap.
There are two solutions for masking any gaps:
Attach using a grab adhesive either before or after the floor covering is laid. If the quadrant or moulding is to be painted or stained then it is best done prior to fixing to provide a neat finish.
Carefully shape the stripwood along its length using a craft knife or hand plane to match the slope or sag of the floor.
Once a good match has been achieved the stripwood profile can be fixed to the front face of the bottom liner using a fine line of grab adhesive, ensuring that the top edges of both are flush with each other.
Paint or stain the stripwood as required. Before painting or staining it is a good idea to mask the edge of the bottom liner with low tack masking tape to prevent paint or stainer being transferred to the liner itself. When the masking tape is removed the finished edge will give a neat appearance.
Quadrant beading is available in a number of sizes (9, 12, 16, 18 and 21mm) and is also available in a number of colours and wood finishes. Choose the best colour match for your liners and strike plates. It may be worth visiting a flooring supplier as many colour and finish options are available for use with laminate or timber floors.
If a good colour match cannot be found then select a neutral wood colour and stain it with a best match colour stain.
To fix the quadrant beading use a grab adhesive such as ‘No Nails’ or similar, following the manufacturer’s instructions.
No it’s not a joke, occasionally, sliding doors can move by themselves during the night.
The cause of this can usually be attributed to the bottom track not being perfectly level and when temperatures drop during the night and the bottom track contracts slightly, the doors can very occasionally slide by themselves.
If you find this is happening with your doors it is a simple matter to fit door positioners which will either fit in to the bottom track (aluminium frame) or in to the top track (steel frame). Which are easy to fit and come with the doors.
Use our online design tool now to choose your perfect sliding doors for your sloping floors.
If you have any questions about installing sliding wardrobes on a sloping floor or anything else; please call us on freephone 0800 036 1730.

We offer a custom design
service at NO extra cost.
Follow these simple guidelines to
get the perfect fit for your sliding
wardrobe doors.
The sliding wardrobe doors are
very easy to install so you don’t
have to be a DIY expert.
Request FREE samples to help
with the design process and
colour matching.